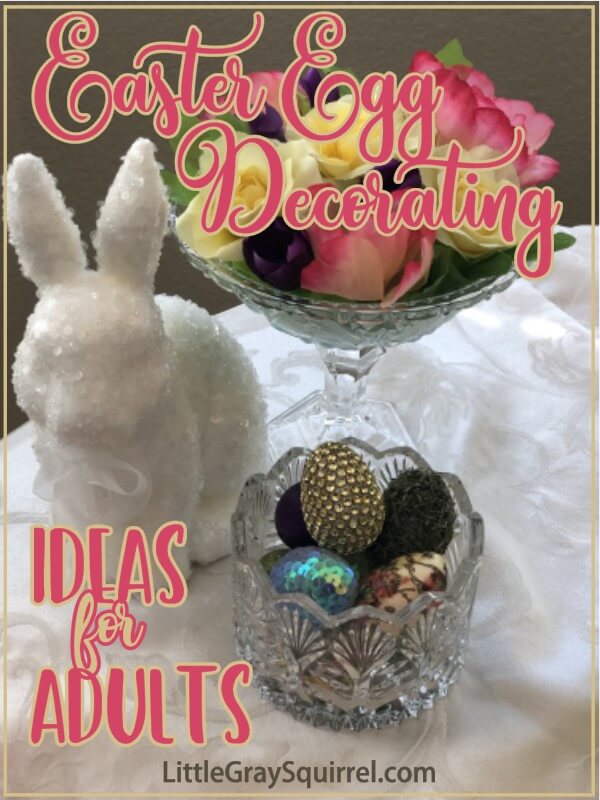
Easter Egg Decorating Ideas for Adults
5 easy Easter egg craft ideas you can make and enjoy year after year.
Crafting with kids is fun, but sometimes you want to unwind and make something pretty for yourself.
The techniques I am sharing today can be used on most kinds of eggs. I am using smooth foam eggs but you could also use real eggs (with the yolk and whites cleaned out), paper mache eggs, wood eggs, or any other type that lets you use the eggs year after year.
**This post contains affiliate links. When you click these links I may make a commission on purchases made through those links. As an Amazon Associate I earn from qualifying purchases.** Please read our disclosure policy for more information.
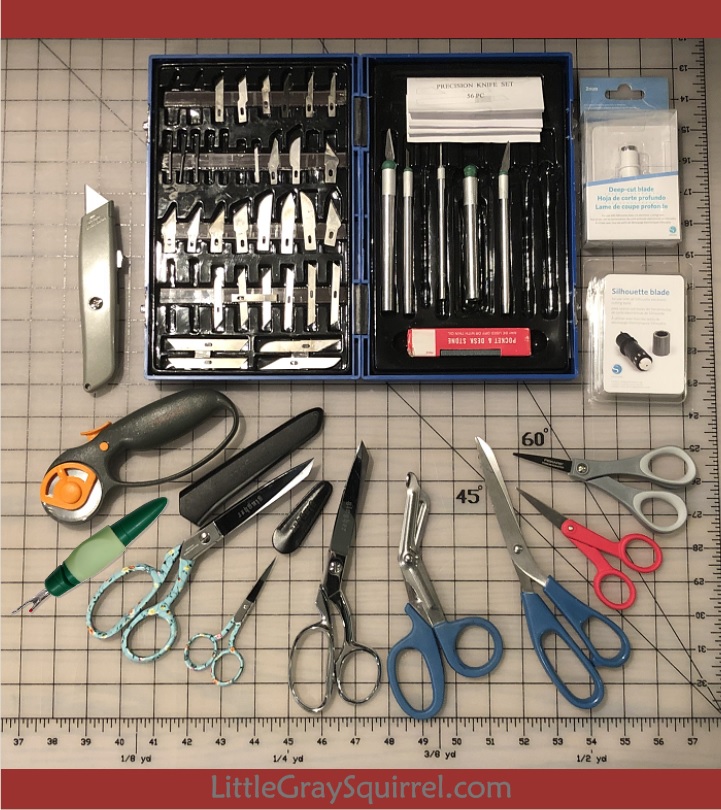
What do you need to decorate Easter eggs?
There are infinite ways to decorate eggs for Easter. In addition to the classic dye decorating, you can use all sorts of supplies you may have on hand.
This can include:
- Stickers
- Ribbon
- Buttons
- Beads
- Crayons/wax
- Markers
- String
- Glitter
- Tissue Paper
- Sequins
- Artificial Flowers
- Washi Tape
- Paper
- Vinyl
- Paint
- Gold or Silver Leaf
I used a few of these items when I created the 5 different decorated eggs for this tutorial.

If you are unsure what any of the products I used look like, you can watch the video or click the link to the product in the supply list to see an example.
Check out my video for the step by step tutorial of 5 ways to decorate Easter eggs.
1. Decoupage Easter Egg

Decoupage is an art that has been around for hundreds of years. It involves gluing layers of paper onto an object. For the eggs, I used pretty, French themed napkins torn in small pieces. You want to use paper with a small pattern when applying it to a small egg so you can see the elements of the design.
Supplies needed to make a decoupage decorated egg:
- Foam egg (I used 5cm tall eggs)
- Paper Napkins or Tissue Paper with a pretty pattern
- Mod Podge (matte or gloss finish, depending on your preference)
- Paint Brush
- Skewer
- Foam Block (optional)
Directions:
- Insert skewer into bottom of egg
- Tear paper into small pieces. Tear the parts of the pattern you want to use on the egg. Think about alternating colorful pieces with muted pieces so the colors stand out.
- Dip the paint brush into the Mod Podge and paint a thin coat over the whole egg.
- Pick up a piece of tissue and place it on the egg.
- Gently brush the tissue with a thin layer of Mod Podge.
- Pick up another piece of tissue paper and slightly overlap it on top of the first piece of tissue.
- Gently brush that piece of tissue with Mod Podge.
- Repeat the process to completely cover the egg with paper and a thin coat of Mod Podge.
- Let dry completely.
- Coat with another thin layer of Mod Podge.
- Let dry.
- To cover the hole; remove the skewer from the bottom of the egg, add a touch of Mod Podge to the edge of the hole where the skewer was, add a small piece of paper and gently brush Mod Podge over the paper and let dry.
2. Bling Easter Egg
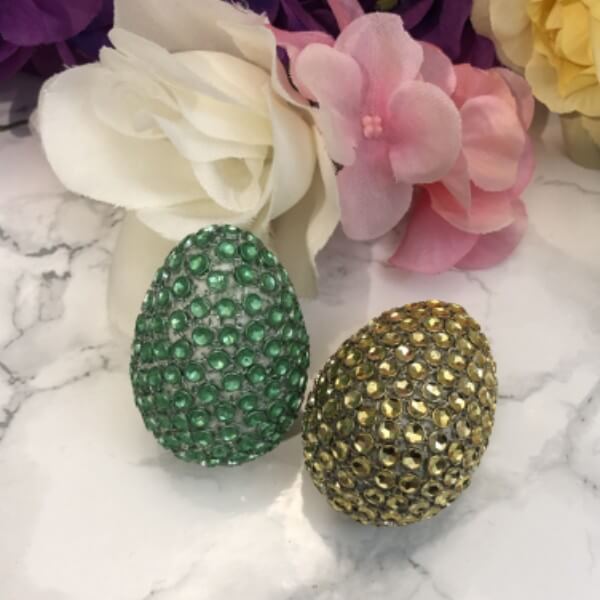
This bling egg was my son’s idea. He wanted me to use some of the “bling” ribbon I had. It turned out amazing. It took a little longer than the other ones to make but it is so unique and pretty.
Supplies needed to make a bling decorated egg:
- Foam Egg (I used 5cm tall eggs, but larger ones would be nice too)
- “Bling” mesh ribbon
- Adhesive Spray
- Skewer
- Scissors
- Silhouette Pick Me Up Tool or Tweezers
Directions:
- Cut the “bling” ribbon into individual pieces, leaving the bits of thread mesh connected. (I used about 12″ of 4 bling wide ribbon per egg for the 2″ tall eggs).
- Insert the skewer into the bottom of the foam egg.
- Evenly coat the egg with adhesive spray. (make sure you cover your work area to protect it from adhesive overspray)
- Let the adhesive spray dry for about 5 minutes until the egg feels tacky.
- Using the Silhouette Pick Me Up tool, or tweezers, pick up a piece of bling and place it on the top of the egg.
- Place another piece of bling just below the first bling, continue to place a ring of bling around the first piece.
- Place a piece of bling under the second row, in-between two pieces in the row above. Continue to place a ring of bling around the second row.
- Continue placing bling, piece by piece, working in rows, from the top of the egg to the bottom, putting them close together so the egg is filled with bling.
NOTE: The bits of thread stuck to the back of the bling fills in the spaces on the egg nicely and makes it look like a mesh covering under the bling.
It took me about 20 minutes to put the bling on each 2″ egg after the adhesive was tacky. It can definitely be a nice relaxing project if you like repetitive tasks.
3. Sequin Easter Egg

This sequin egg is beautiful, quick, and easy. It not only makes a pretty Easter egg, it would also be a pretty dragon egg if you need any of those.
Supplies needed to make a sequin decorated egg:
- Foam egg
- Skewer
- Adhesive Spray
- Sequin Ribbon (each 2″ tall egg uses about 3′)
- Straight Pin
- Scissors
Directions:
- Insert skewer into bottom of egg.
- Evenly coat the egg with a thin layer of adhesive spray. (make sure you cover your work area to protect it from adhesive overspray)
- Let the adhesive spray dry for a couple of minutes. It will hold the sequins easier if it is slightly tacky.
- Unravel about 3′ of sequin ribbon from the spool.
- Place a single sequin on the very top of the egg and stick the straight pin into the center of the sequin to hold it in place. (This single sequin is the first “row”)
- Start wrapping the sequins around the egg, slightly overlapping the top, center sequin. This is the second row.
- When you get to the third row, begin wrapping the sequins slightly under the second row.
- Continue to wrap the sequins around the egg, slightly under the row above, until you wrap the entire egg.
- Remove the skewer.
- Cut the string holding the sequins together and place the last sequin over the hole where the sequin was.
- Press the sequins gently to make sure they are all adhered to the egg.
4. Moss Covered Easter Egg

This egg adds texture to the group of decorated eggs. My son says it looks like a bush. That may be, but I think it is pretty. I used Spanish style moss but you could use a fine, green moss, just make sure it is dried.
Supplies needed to make a moss decorated egg:
- Foam Egg
- Skewer
- Mod Podge (I used gloss, but matte finish would probably look more natural)
- Paint Brush
- Dried Moss
- Scissors
Directions:
- Insert skewer into bottom of egg.
- Cut the moss into tiny pieces.
- Brush a coat of Mod Podge on the egg.
- Sprinkle and press the moss pieces into the Mod Podge. Cover as much as will stick and let dry.
- Dab Mod Podge onto the parts of the foam egg that show through.
- Sprinkle more moss on the egg and let dry.
- If needed, repeat with Mod Podge and moss until you can’t see the foam egg any more.
5. Glittered Easter Egg

Because glitter. This is another quick and easy Easter egg craft. The hardest part is waiting for the Mod Podge to dry. I gave it a final coat of Mod Podge so it didn’t leave a dusting of glitter everywhere but if you prefer the extra sparkle, leave the top layer of glitter exposed.
Supplies needed to make a glittered Easter Egg:
- Foam Egg
- Skewer
- Paint Brush
- Mod Podge (gloss finish helps the glitter keep its sparkle)
- Glitter (I used extra fine but it is up to you)
- Foam Block (optional)
Directions:
- Insert skewer into bottom of egg.
- Brush a thin coat of Mod Podge to cover the egg.
- Working over a piece of paper, sprinkle the glitter over the egg, turning it to coat it evenly.
- Push the bottom of the skewer into the foam block and let dry.
- Holding the egg over the paper, tap the skewer to knock off excess glitter. Collect the glitter and pour it back into the container.
- Brush a second, thin coat of Mod Podge over the glittered egg.
- Sprinkle a second coat of glitter to cover the egg and let dry.
- At this point, you can tap off the excess glitter and leave as is, or brush a final coat of Mod Podge over the glitter. Either way looks nice, it is personal preference (as to how much glitter you want everywhere).
NOTE: There are spray sealants, but I recommend not using a spray product on foam eggs because it can make the foam shrivel up.

These are only five of the infinite ways you could decorate Easter Eggs to reuse in your décor year after year. If you are inspired to try any of these techniques, I would love to see them. Share them on Instagram or Facebook and tag me @littlegraysquirrel
I had a lot of fun creating these how to decorate Easter egg tutorials. Of the five, which are your favorite? Do you like the Decoupage, Bling, Sequin, Moss, or Glitter eggs best?
[mailerlite_form form_id=2]Best,
Megan