Welcome Fall with Homemade Apple Cider
How to Make Fresh Apple Cider at Home
Making fresh apple cider with an apple press is fun and easy. It is a great way to use up the apples from apple picking or your own apple trees.
Here is how to make apple cider with an apple press.
**This post contains affiliate links. When you click these links I may make a commission on purchases made through those links. As an Amazon Associate I earn from qualifying purchases.** Please read our disclosure policy for more information.

Making apple cider is essentially a four step process:
- Get apples
- Wash the apples
- Crush or grind the apples into a pulp
- Press the apple pulp to release the juice
- Drink, store, or ferment the juice
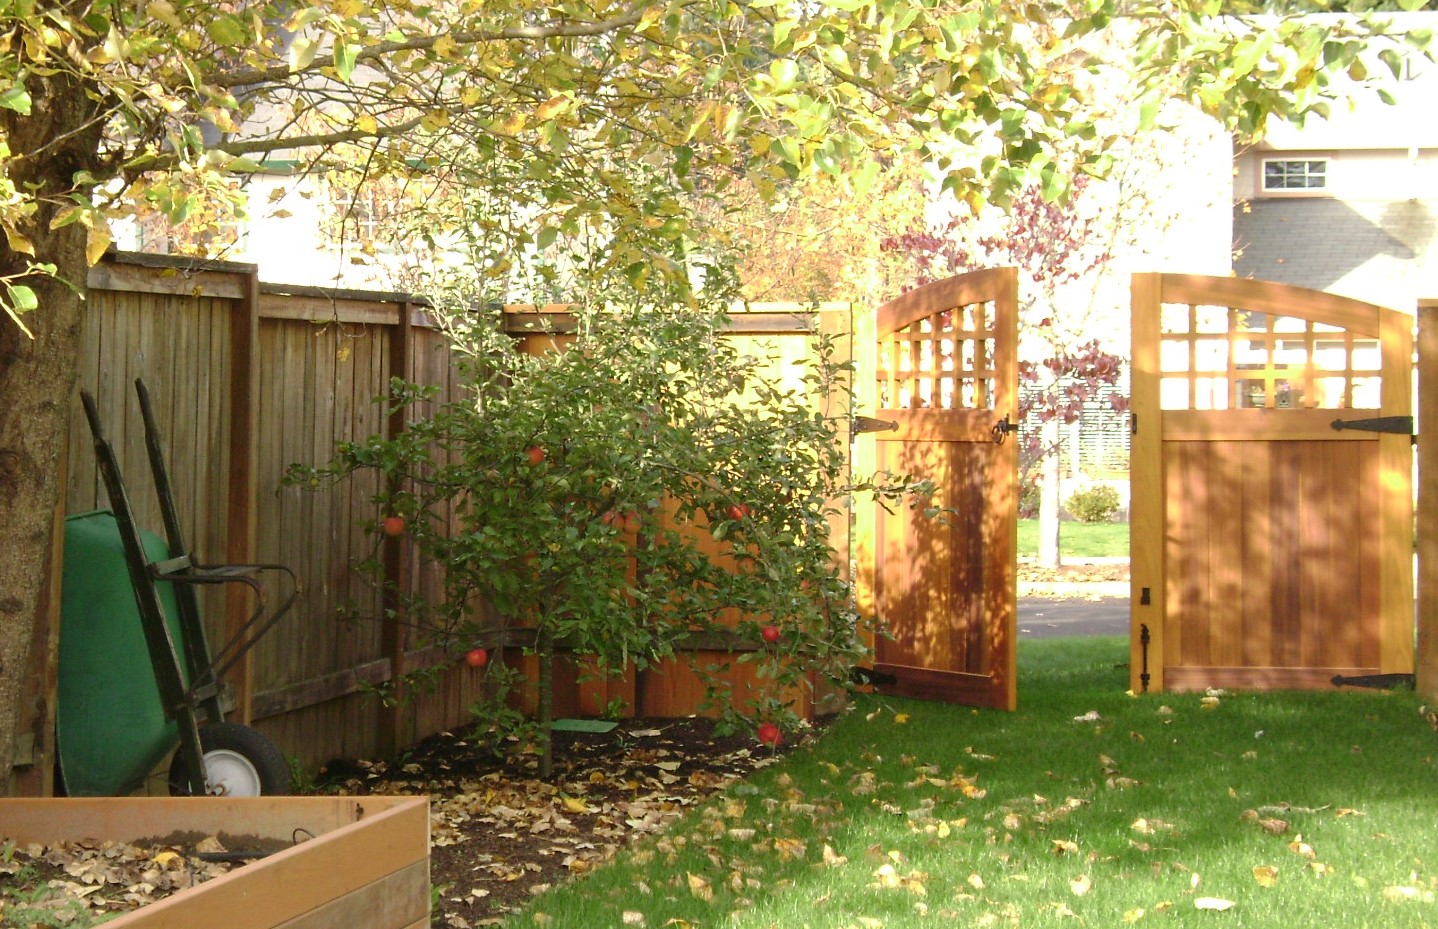
Where to get apples to make fresh apple cider
The Portland Nursery has been a favorite destination of ours for their (Free!) annual apple tasting. It was my visits here that first inspired me to try making fresh pressed apple cider at home. They have about 60 varieties of apples and some pears too; with a large variety available on hand for sale by the pound. There are varieties for eating fresh, for baking and of course for making cider.
Another local orchard that we like to go to in the Portland area is Oregon Heritage Farms.
Not only do they have a variety of apples to buy, they also have apple cider slushies and apple cider donuts for an added treat.
Over the years, I have mixed my own blend of sweet, tart and juicy apples. One year, I even pressed a tasty batch of apple-pear. But in an effort to simplify, and have consistent batches, I have switched to only using Jonagold, which technically is two varieties, as it is a hybrid of Jonathan and Golden Delicious apples. They have excellent flavor on their own and are quite juicy.
Since it takes quite a few apples to make a gallon of cider (see below for more info on yield), I have tried several ways to get fresh, high-quality apples at a good price. I have bought from the nursery, local farms, farmers markets and the grocery store. If you don’t live near apple orchards, head to your local grocery store. I have been able to get a great deal on them by buying them at Albertsons/Safeway. When they are in the weekly ad for less than a dollar per pound, I ask the produce manager for a whole case (or two). I also typically get an additional 10% off for buying whole cases. Added bonus: The apples from my local Safeway are grown in an orchard just a few miles from my house.
TIP: You should not use apples from the ground, also known as “windfall” apples. They can possibly be contaminated with bacteria and/or fungi that can product harmful toxins that can not be cooked out. Read more about these contaminants here and here.
How to make your own fresh pressed apple cider
 Rent, borrow, or buy an apple cider press:
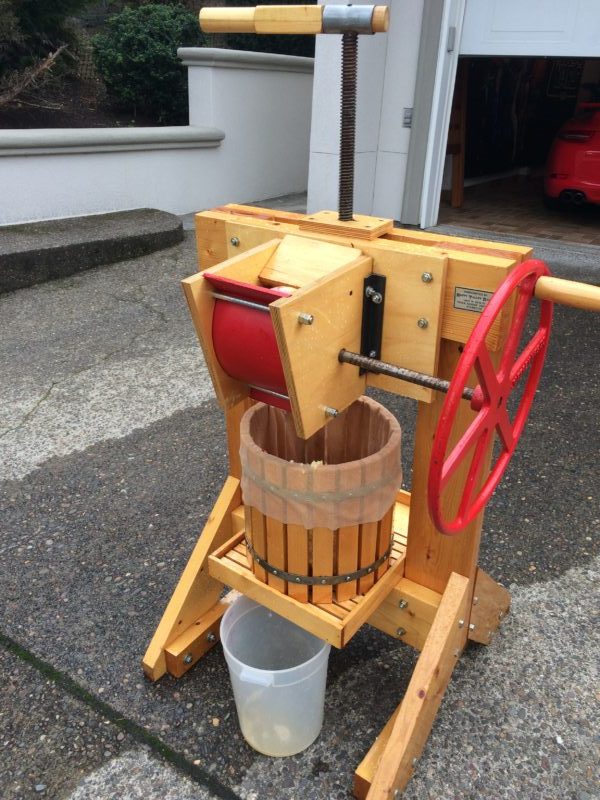 Rent, borrow, or buy an apple cider press:
I rented a cider press for a couple of years but it was in rough shape. It was old and rickety, and had wood flaking and splintering off of it. It didn’t seem food safe at all. Then, back in 2004, my husband surprised me with a new cider press for my birthday. The best part was, it was a kit! I got to prep the wood, and assemble it. Good thing, since my birthday is in the spring, so I got to “play” with it while waiting for fall. He got me the Pioneer Cider Press & Grinder from Happy Valley Ranch. They have a few presses varying from the home/hobby maker to larger sized press for higher production. I have had my press 16 years now and it still looks beautiful, (thanks to the EZ-DO polyurethane gel that comes with the kit) and works perfectly.
Where to buy a cider press
The Pioneer Cider Press and Grinder is the press that I have and used since 2004. You can find that press and a few more even larger presses on their site.
While I have been very happy with my cider press, it is on the large side and probably overkill if you are just making a couple of gallons at a time.
It is also rather expensive for a hobby cider maker.
If you are only making a couple of gallons at a time, you can get set up for much less. This fruit press and grinder is plenty sufficient for the occasional cider maker.
Since the threaded shaft for twisting down the wood plate is in the center of the wooden barrel on the press above, you will need a separate container like a 5 gallon bucket to rest the fruit grinder on while grinding up the apples.


If you are planning to freeze some cider, it is good to have some half gallon or 16 ounce bottles ready to fill and freeze.
It might also be helpful to have a pallet or wood base to screw the press onto to hold it in place while you turn the handle and press the apples.
Chose a cider making location:
Grinding apples can get messy. Bits of apple and juice tend to go flying during the grinding process. You will want to set up in an area that can be hosed off before and after the cider making. I use my driveway or a patio.
Prepare the apples for grinding and pressing:
Regardless of where I buy the apples, I wash them first in fresh water with a clean vegetable scrubber or washcloth, focusing on the ends which can be dirty.
The grinder in my apple cider press grinds up apples like a champ so it does not require pre cutting the apples. Give it a try first without cutting, if you are having trouble turning the grinder, go ahead and cut them but otherwise, save yourself that step.

Making the fresh cider:
Start with a clean cider press and parts. Follow press instructions to set it up.
These are the steps to take for using the Pioneer Press:
- Place the wood grate on the bottom platform.
- Fit the mesh bag inside the slatted barrel with the edge folded over the top and place it on the grate.
- Slide the grate and lined barrel forward, under the grinder so it catches all the bits.
- Place a two gallon container under the hole in the platform before you start grinding the apples. Juice will start to flow before you press and you don’t want to lose any. Have an empty container within reach, ready to swap out.
- Start turning the grinder crank, add apples one at a time until the mesh lined barrel is about half full.
- Lift the sides of the mesh bag and twist the bag until it is snug against the pulp. Fold the twist over and place the wood pressing disk on top.
- Slide the barrel and grate to line up under the screw shaft and start turning the screw handle until it touches the wood disk. Adjust the barrel if needed to make sure it is aligned properly.
- Crank down the screw until it won’t press anymore and juice stops flowing.

TIP: Fluff and repress the pomace. Unscrew the shaft until you can remove the wood disk. Pull the pulp bag out and smoosh it from the sides until it is fluffed up. Place it back in the barrel, re-twist the bag, replace the wood disk, line it up again and repress. You should get more juice. Empty the pressed pulp and continue until you are out of apples.
TIP: Pressed apple pulp, also called “pomace” can be composted or fed to farm animals or wild life.
Safety First!
When working with kids, we discuss how to add the apples to the grinder without putting fingers in harm’s way and then let the kids get to cranking.

Have one child, er um, person, crank and one person add the apples one at a time into the turning grinder. There isn’t a need to cut the apples unless they are unusually large, but if one gets jammed more than a back turn can fix, an adult uses a piece of wood to push it in while the crank is being turned. It is a good idea to back turn the crank every once in a while to keep the pulp from blocking up in the back.
It should go without saying but never turn the crank while someone’s hand is in or near the grinder. The metal pieces that do the grinding are not necessarily sharp but they do an excellent job at tearing up whatever is passing through.
How much cider will you get from your apples?
A bushel of apples is 47#. If you buy apples by the case from a grocery store, it will weigh 40#. The number of apples in a case is determined by the size of the apple. This can range from 216 tiny apples to 48 large apples that weigh almost a pound a piece.
Although my press will hold much more, I usually only grind about 1/3 box (about 13#) at a time, press until it won’t turn any more, back off the press, fluff the pulp and press again before grinding more.
I have noticed that I am able to get more cider that way than if I grind half box or a full box at one time. You should get 2-4 gallons of cider from 40# of apples but it really depends on the variety of apples you choose. For example, I made a batch of cider I using 40# of Jonathan, 40# of Akane, and 10# of Newton Pippin. I pressed it in five batches and I ended up with just over five gallons which is about 18# of apples per gallon.
On a different batch of cider making, we used 20# of Fuji apples and only got 1 gallon and 20# of Jonagold and got closer to 2 gallons. The type of apples you use will determine the quantity of cider. Fuji apples are not as juicy as Jonathan.
A blend of 37# Gala and 75# Jonagold yielded almost 7 gallons which is about 16# per gallon.
Drinking fresh pressed apple cider:
Some people drink their cider fresh after pressing. Since I prefer to be on the careful side when it comes to food safety, even though I wash the apples before pressing, I pasteurize my cider before drinking.
How to pasteurize fresh apple cider:
Pour cider into a non reactive pot and heat over medium-low heat. Stir occasionally so it heats evenly to 160 degrees for at least 10 seconds, then either drink hot or pour into a non reactive container in an ice bath to cool it quickly. If possible try to avoid heating it above 165 degrees because it will continue heating and if it reaches 175 degrees the pectin solidifies and makes the cider have little flecks of pectin floating in it. I personally don’t mind if the pectin solidifies (read: don’t get a chance to watch the temperature that closely), I just pour the cider through a cheesecloth lined strainer to remove excess “foam” or solids before storing.
For information on apple cider pasteurization check the Oregon State University Extension website or Windy Hill Orchard website.
TIP: If your heat is too high then you risk your cider heating up too quickly and going beyond the recommended temperature.
Storing apple cider:
Apple cider can be stored in the refrigerator for 5-7 days. For longer storage, pour into plastic containers, leaving about ½”-1” of space to allow for expansion, and freeze for up to 6 months.
These bottles are great for storing cider in the fridge or freezer. I prefer these smaller plastic bottles or half gallon size like pictured above for freezing because you can thaw one or a few at a time as opposed to a whole gallon.
How to Make Hard Apple Cider
I tried making hard apple cider a number of years ago. It was a fun experiment and I actually earned a second place red ribbon at my county fair with it. I definitely recommend giving it a try if you are interested.
I am not skilled enough in that area to teach someone how but here are a couple of books to get you headed in the right direction:


When it comes to welcoming Fall, nothing does it better than an apple cider making party. Making fresh pressed apple cider at home is fun and easy. Family and friends take turns grinding apples into pulp and pressing our own homemade apple cider.
It is also a good opportunity to stock the freezer with cider. We make sure there is enough for everyone to sample, and some left for anyone who wants to take some home.
Thanks for stopping by! I hope you get the chance to make some homemade fresh apple cider this fall.
Best,
Megan