How to Make a Mockup in Silhouette Studio
Mockups are a great way to show what the products you can make will look like or variations of products without having to actually make them. Creating mockups in Silhouette Studio is my preferred method because I am already in Silhouette Studio when I am creating my products or graphics for my listings and I am most comfortable using it.
Read moreIt really is quick and easy to create mockups with Silhouette Studio once you know the basic steps. If you already are familiar with what mockups are, use the table of contents to jump right to the tutorial.
I will also share my secret way to save as png or jpg in Silhouette Studio without Business Edition too so check that out if you need to know (psst… it isn’t by taking a screenshot or using the snipping tool but you could do that too).
**This post contains affiliate links. When you click these links I may make a commission on purchases made through those links. As an Amazon Associate I earn from qualifying purchases.** Please read our disclosure policy for more information.
What is a mockup?
If you are a crafter or maker or sell things online, a mockup or mock up is when you place a design on a photo or image of a product using design software to make it look like a finished product.
The definition of mock when used as an adjective is “not authentic or real, but without the intention to deceive”.
The goal is to show what the product should or could look like when it is finished.
What are mockups used for?
Mockups can be used in many different ways. Anytime you want to show how something will look without actually creating it, you can create a mockup of it.
Here are some examples:
- When selling digital designs or graphics like cut files or sublimation graphics – You can put the design you created on an image of products or with some pretty graphics to show how the end user will use it. In this case you might want to show the design on a few different products.
- When selling digital products – For example, if you create ebooks, printables, courses, websites, apps etc. Mockups are very helpful to show the customer what is included in the product or what it will look like even though it isn’t a tangible product until or unless they print it out.
- When selling physical products – You can put the design on a photo of the product it will be actually sold on like a t-shirt, mug, tote bag, sign, etc.
- When creating personalized or custom work – You create an image of what the finished product should look like and send your client or customer a photo of the mockup. I highly recommend creating a mockup when doing custom work for the customer to sign off on before creating the product. This is beneficial for overall design, colors (but colors can vary by computer screen), and spelling if it has text.
- To make the design the right size and proportion for the product – I often open an image of what my design will go on or at least draw the shape of the item so I can see how it looks and how to size it before I cut it.
Please note. It is very important that the product you are mocking up is a viable product before trying to sell it using mockups. This goes for digital and physical products.
If you create a digital product like a cut file for example that is too thin or that has lines that are too jagged, or distressed, or not properly welded, it can prevent your customer from using it successfully.
Alternatively, if you take a digital design and put it on something you have never made before, your customer will be expecting it to look like the photo but maybe you aren’t able to replicate it.
You should practice the techniques of creating the product.
Putting HTV on a t- shirt can be different than on a sweatshirt or tote bag, putting vinyl on a wine glass which probably has a curved surface is different than on a straight sided coffee mug.
If you are using mockups to sell a product you should put a disclaimer in your listing that it is a mockup so the finished product (size, placement of design, color of vinyl, color of product ) could vary from the photos.
What software do you need to create mockups?
Most software that can create graphics can also be used to create mockups. Some software like Photoshop is better than others for more professional looking mockups. You are able to change the way the design looks on wavy or curved surfaces for a more realistic look.
I am showing how to create mockups in Silhouette Studio today but you can also create them in free software or design programs like Canva, Powerpoint, and Inkscape.
What is a Watermark?
A watermark is an image (like a logo), pattern, or text that is placed on top of an image to help identify the creator or owner of the image. It is usually made to be transparent so it doesn’t interfere with the look of the photo.
Watermarks are a great way to add an identifier to your images. A watermark can also help deter people from just tracing your design and making a cut file out of it without buying it.
What do I need in order to create mockups in Silhouette Studio?
You will need the image of the product that you will be putting the design on, the digital design or artwork, and your logo or watermark (optional) and ideally Silhouette Studio Business Edition.
Where can I get images to create mockups?
Take photos of products yourself to use in your mockups. I only recommend this if you can take high quality photos that will appeal to your customers.
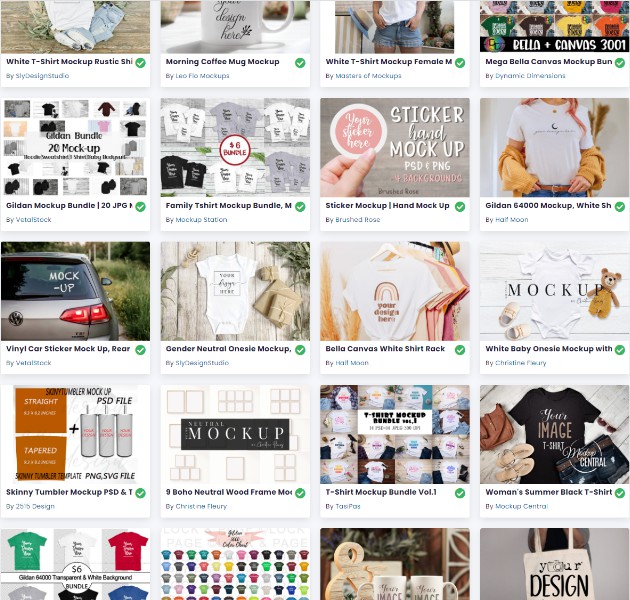
There are hundreds of beautiful mockups available online for free and very inexpensive.
Choose high quality photos that will represent the product well because that is a big factor in which your customer is basing their purchase on.
You will need to use images that allow for commercial use. Even though you are not selling the images themselves, you are using the finished images to promote or sell your product.
My favorite sites to get commercial use graphics online for mockups are:
These link directly to the mockups category on each site.
CreativeFabrica
DesignBundles
TheHungryJPEG
Creative Market
Search terms you can use to find images for mockups are flat lay, product photo, styled ____ (mug, tote, sweatshirt etc.), scene creator, copy space, you can also search by the item or model number.
For example Bella Canvas shirts are popular for decorating. There are lots of mockups using Bella Canvas 3001 t-shirts.
What file types do I need to make mockups?
For the image you will be placing the graphic or design on, the most common file types for graphics are PNG and JPG.
For the design or graphic you will be putting over your image to create the mockup you can use PNG with a transparent background or you can use vector files like SVG, DXF, or fonts and dingbats.
In some cases you can use a JPG with a solid background if your mockup image is the same color as your design JPG background, otherwise you will see a white (or other color) square around the design.
You can use a background remover or trace and detach if you only have a JPG available.
If the design you want to use is an SVG, you will need the upgraded Designer Edition or above to be able to open it in Silhouette Studio.
Do I need an upgraded version of Silhouette Studio to create a mockup?
Not necessarily but it will be quicker and easier.
You can create the mockup using the features in any edition of the software. What it depends on is the type of file you plan to use to create the mockup and how you want to save or export the file.
All versions of Silhouette Studio can open PNG and JPG files so the image you are creating the mockup with isn’t the issue. The type of file for the design that you plan to place on the image to create the mockup is what would determine if you need a software upgrade or not and how easily you want to save it.
You can use Silhouette Standard/Basic Edition:
- If you created the design in Silhouette Studio
- If the design you are using is a PNG or JPG
- If you are using a DXF
- If you don’t mind the extra steps needed to save as (Print to) a JPG or PNG
You want to use Designer Edition or Above:
- If the design you are using is an SVG
- If you don’t mind the extra steps needed to save as (Print to) a JPG or PNG
You want to use Business Edition:
- If you are using EPS, or AI file
- If you want to quickly and easily save the mockup as a JPG or PNG
You can only “save or save as” a PNG or JPG in Silhouette Studio if you have Business Edition.
You can “Print” to a PDF creator that has the ability to save as a PNG or JPG in any version of the software using a work around or hack and it works ok but it adds steps.
I will share the steps to print to save as a JPG in the notes below.
I highly recommend the Business Edition upgrade because it unlocks all the features of the software. It is especially worthwhile if you are creating products to sell because it will save you time and you can’t sell .studio files.
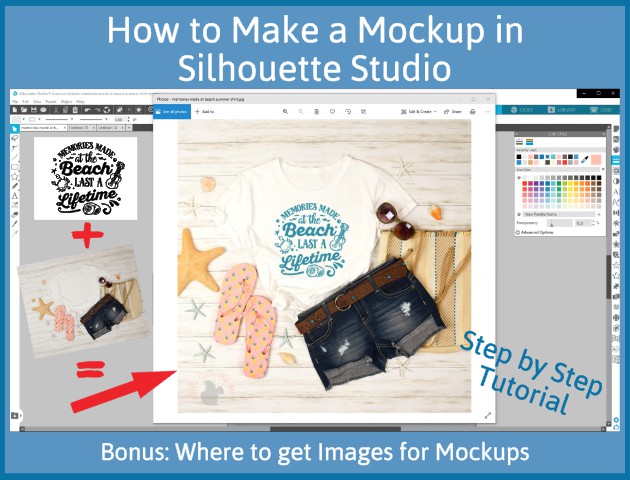
Creating a Mockup in Silhouette Studio
Page Setup
Open a new design page in Silhouette Studio and open the Page Setup Panel.
For more info on how to know what measurements to use for your page setup, see notes below.
For this mockup we will be setting it up as a square image that is suitable to be shared on Instagram.
- Machine: Doesn’t matter which you choose
- Cutting Mat: Can be on or off, doesn’t matter
- Media Size: Custom
- Set the page with a width of 8” and height of 8”
- Transparency: 0 (I prefer to design on a white background and turn the grid on if needed).
- Make sure the Orientation is set to Portrait (unless it is a square, then it wouldn’t matter).
- No need for the print border or cut border on unless you plan to print the image.
Open the Files
Open the image file you want to use for the mockup.
Either drag the unzipped file onto your page or go to File, Merge, and select the file you want to open.
Open the design file or create the design.
Open any other images or designs you want to use for the mockup (like your watermark image).
Adjust the Mockup Image
Size the mockup image to your page and crop as needed. If you are using a mockup photo that isn’t a plain white background, make sure the mockup image completely covers the white page of the Silhouette design screen, otherwise the image won’t be the full size of your page when you save it or it will have a white space around the image.
Use the image effects panel to adjust the brightness, color and saturation of the mockup image if you would like .
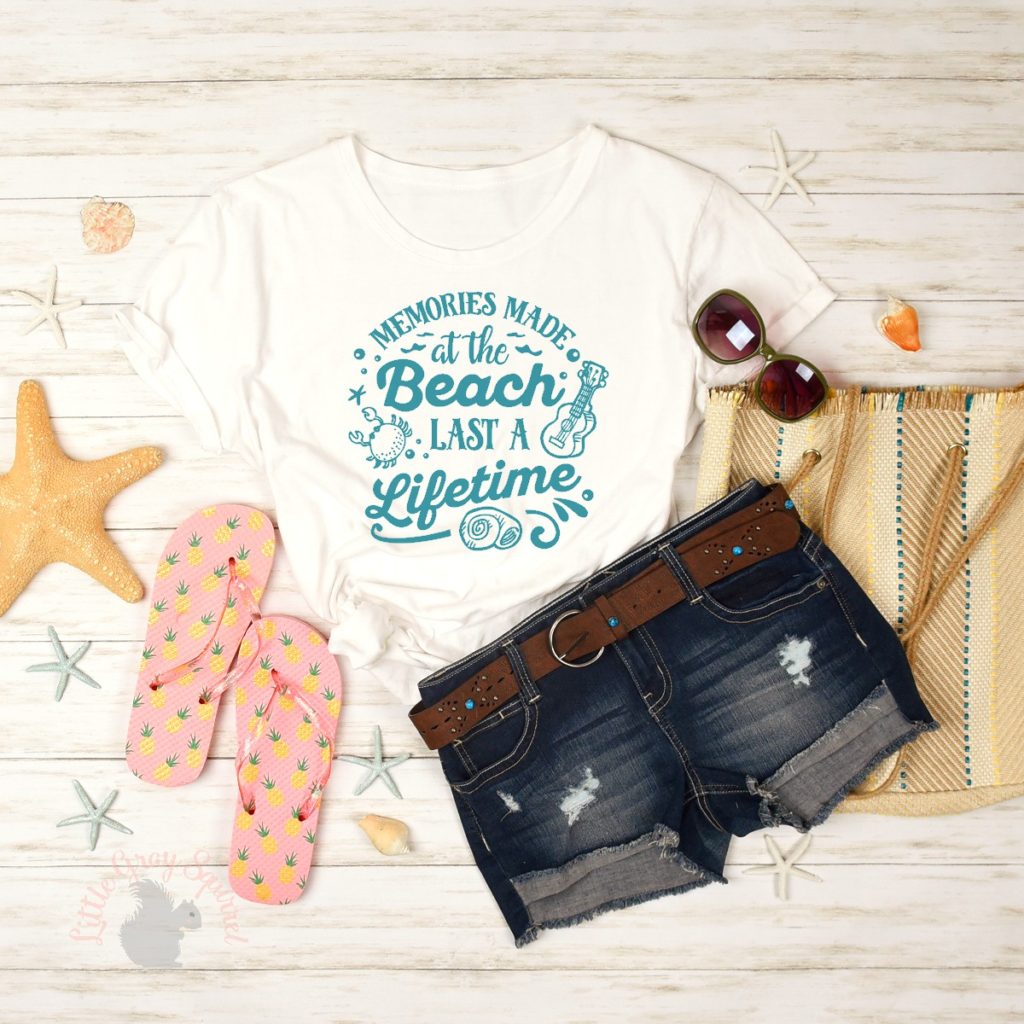
Place, Resize, and Change the Color of the Design
Place the design on top of the image and make it the size you want.
If you will be making a finished project that needs to look like the mockup, choose a fill color for the design in a color of vinyl, paint, or whatever materials you have.
If you are just using this mockup to sell the cut file or plan to use POD you can use any color you like or use the eyedropper tool to select a color from the photo so it looks cohesive.
Change the line color to match the color of the design. If the edges of the design look a little pixelated try changing the line thickness to 0.25.
Go back to color fill panel and increase transparency to about 8%. The line color should be fine as is but if you can see the outline you can increase the line transparency to 8% too.
Add a watermark to a mockup
Add your watermark to the image if desired.
To create a watermark from your logo, open a png with a transparent background (or remove the background from a jpg) and place it on your mockup. Go to the color fill panel and increase the transparency until you can still tell what it says but you can see the mockup through it.
Place the transparent logo where you want it to be on top of your image.
If you don’t have an image of your logo you can type your name, business name, or social media account to use as a watermark.
Type the text, fill it with color, and set the line color to match.
Place the text on your mockup image.
Open the fill color panel and increase the transparency of the fill color until you can still read it or tell what it is but it isn’t bold enough to take away from the overall photo. Increase the transparency of the line color as well.
You can also type tiny text in black and place it in an inconspicuous place on the mockup. Place the image or text in a place on the photo where it can’t easily be cropped out.
You can also draw lines or dashed lines and increase the transparency and place them across the mockup to help prevent tracing the design on the mockup.
Make sure everything looks the way you want. Check colors, sizing, placement, double check spelling if it has text.
Always double check spelling, grammar, and punctuation.
Saving your mockup
I recommend having a file folder on your computer or external hard drive that has your mockup assets in it. When you create a mockup with a design, create a folder in that folder for it.
For this project I will create a folder for beach shirt mockup.
In that new folder I will save the jpg of the mockup and the original .studio3 file in case I want to go back and change anything like adding a different color and then saving as a new jpg.
An example of the folders might be, a Beach shirt mockup folder in an Etsy Folder on my External Hard drive.
To save in Business Edition use Ctrl + Shift + S or go to File, Save As, and choose save to Hard Drive.
If necessary, navigate to the file for your mockup and name your file.
I saved this as memories made at beach summer shirt, then select Save as type JPEG and choose OK.
It will ask you to enter the width and height in pixels or the DPI. It actually means the width or height since you can’t change more than one of the numbers in that screen, the others will adjust accordingly. For this image I want it to be at least 1080 so I can enter that or round up and use 150 DPI.
The difference between using JPG or PNG is not really discernible on a computer screen. If you were printing the image, you would want to use larger page dimensions and save at higher DPI. But for images you plan to use online, you don’t want the file size to be too large because it will take a long time to load (or possibly not load at all).
JPG (smaller file)
PNG (higher quality but larger file)
After saving, open the file to see how it looks.
Then go Ctrl+Shift+S again and save the .studio3 file with the same name and add original or master to the title for future use.
TIP: When naming your files that you plan to use for product listing online it is a good idea to use keywords in your file name that people would search for because it is good for SEO – Search Engine Optimization.
When creating files I plan to save as an image like mockups, I always save a .studio3 version of the file so I can easily go back and make changes if I want (design placement, color, watermark,) and then save as an image. Once you save as a PNG or JPG you can’t change it.
Watch the Video: How to make a mockup in Silhouette Studio
NOTES:
How to determine page/media size when creating images in Silhouette Studio
The dimensions of your page combined with the DPI are what determine the size of the image.
When talking about the size of an image or photo, there are different meanings.
One is the dimensions of the image if it were printed like 4×6.
Another is the aspect ratio. This is a common sizing for digital images and screens.
For a 4”x6” photo, the aspect ratio is 3:2. For every three inches wide, it is two inches tall.
Other common aspect ratios are 1:1, 4:3, 5:4, 16:9, 2:3. Ratios are width to height.
Another “size” is the size of the file is when you save it. This is also determined by the dimensions of the page and the resolution/DPI (dots per inch) that you choose when saving.
The higher the dots per inch, the higher or better the resolution but the larger the file is.
Some images need to be smaller than a certain size in order to upload to some sites. For example photos might need to be smaller then 2MB.
The height and width of an image are measured in pixels but when setting up the page in Silhouette Studio we use inches (if you use metric measurements you can convert for your units of measurement).
It is nice to be able to design in a page size that you can see easily so it is best to choose a size no smaller than 4” on the shortest side and no larger than 12” on the longest unless you are creating images to print and need a specific size.
When saving, you will select the DPI to make the image the size you want.
When creating digital images, for product listings, the DPI doesn’t really matter. You can use a lower DPI than 300 and it won’t be recognizably different from 100 DPI on the screen.
If you are creating images to be printed, you would want to save at 300 DPI.
What are you creating mockups for?
You will probably be creating graphics for a specific use like Etsy listing, Shopify listing, blog post, Pinterest, I even create graphics in Silhouette Studio for Youtube thumbnails.
You can do a Google search for “best image size for ______________” to see what you need.
This will most likely give you the size you need in pixels.
For example, for creating images for a Shopify store you would want an image that is 2048 x 2048 pixels.
To determine the page size you need to set in Silhouette Studio just divide the total width or length in pixels by the DPI you will use when saving to get the number of inches you need. This is when I decide how many DPI I will use.
To create an image that is 2048 x 2048 pixels with 100 DPI, you would need a page size of 20.48” x 20.48”. That is a huge page to design. If you increase the DPI, your design page can be smaller.
2048 x 2048 pixels at 150 DPI would need a 13.65” x 13.65” design page
2048 x 2048 pixels at 300 DPI would need a 6.82” x 6.82” design page. So in this case, I would round up just a bit and go with a 7” x 7” design screen and then save with 300 DPI.
You can round up to 6.7” or even 7” because .3” won’t affect the image much. You probably don’t want to round down in case the platform you will be using has a minimum pixel requirement.
In this case, the image is a square so you could create your page in any size and save as 300 DPI but it is important to set your page size big enough and save the image at a resolution that will be big enough for the platform you are using.
There might be a minimum pixel size.
For example, some platforms like Shopify, Etsy, and Amazon let the customer click to enlarge or zoom in on a photo. If the image wasn’t saved at a high enough resolution, it will be blurry when it is enlarged or zoomed in. Images should be at least 800 pixels on the shortest side to be able to zoom in. Some platforms require at least 1000 pixels on the shortest side.
A page size of 4” x 4” saved at 300 DPI is 1200 x 1200 pixels.
300 is a pretty high quality image even if you wanted to print it.
How to Save as JPG or PNG in Silhouette Studio without Business Edition
You will need a PDF creator that will save as a JPG or PNG. Bullzip is a free one I use.
Go through the process of setting up your page and creating your mockup image up until you are ready to save.
Go to File and select Print or type Ctrl+P.
Choose Bullzip in the list of printers.
Click on Preferences.
Make sure the Orientation is set to Portrait.
Click Advanced.
Click Paper/Output if needed to drop down the option to change Paper Size.
If you are wanting to save as letter size 8 1/2″x11″ then you don’t need to change it.
Otherwise, click the dropdown and at the bottom of the dropdown click PostScript Custom Page Size.
Set the Custom Page Size Dimensions the same Width and Height as the page/media size you have set in Silhouette Studio in the Page Setup Panel.
Make sure the unit is what you are using (inches or millimeters).
Click OK
Under Graphic, Print Quality, select the DPI you want.
Click OK.
Click OK when it goes back to Preferences dialog box.
Click Print.
The Bullzip PDF Printer – Create File dialog box will popup.
In the General tab, under Format, choose the file type you want to save as. JPEG for example.
Under File Name, you can either select the word “document” after the \ and replace it with the file name you want to use, or click the three dots next to the File Name, navigate to where you want to save the file to, give it a file name, and click SAVE.
The Bullzip dialog box will still be open, click Save.
In conclusion, to create a mockup in Silhouette Studio all you have to do is place the design on the photo of the product and save it as a JPG but there are a few tricks to create a more realistic looking mockup photo that appeals to your customer.
Thanks for stopping by, I hope you learned something new today!
Best,
Megan