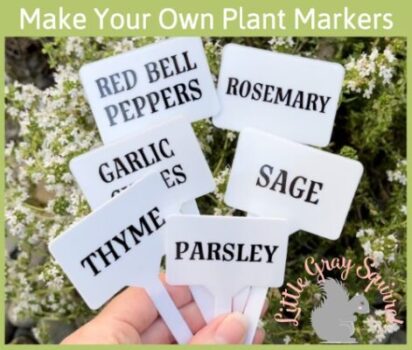
How to Make Plant Labels
Creating your own plant markers to label your garden, planters or raised beds is fun and easy when you use premade SVG cut files. You might even be able to use supplies you already have.
The only thing I love more than crafting is crafting useful things. This project combines using my Silhouette Cameo and making reusable labels for the garden.
Read more**This post contains affiliate links. When you click these links I may make a commission on purchases made through those links. As an Amazon Associate I earn from qualifying purchases.** Please read our disclosure policy for more information.
I used a Silhouette Cameo to create these but the file includes both SVG and DXF files so they can be used on your Cricut or other cutting machine too.
The cut file includes over 300 plant names that you may have in your garden. They include fruit, vegetables, and herb names in both SVG and DXF file format for Cricut, Scan n Cut, Laser, or Silhouette users.
The font is a fun serif that cuts well and is also easy to read.
Supplies Needed
300+ Plant Names Cut File
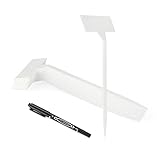
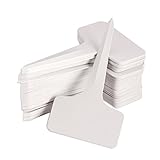
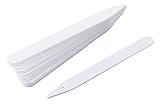
Plant Stakes – See suggestions below
Permanent Adhesive Vinyl
Cutting Machine
Weeding Tool- This is my favorite kind
Squeegee/Vinyl Scraper
Transfer Tape
Rubbing Alcohol
Paper Towel
I made plant markers using plastic plant stakes that I got from Dollar Tree and some stakes that I made myself but there are many styles of plant stakes available.
Here are some different styles of blank signs that you can use to put vinyl on to label your garden.


Make garden labels with a cutting machine
Open a new project screen in your design software.
If you are using the file I created, download and unzip the folder, open the file for the names of the plants you want to label.
Or you can create the names yourself.
Type the names of the plants you want to label.
Select the font you want to use.
Size the names to fit your plant stake.
Tip: To make the names the size you want for your stakes, measure your plant stake and draw a shape in your software with those dimensions. Place the name in the shape and adjust the size of the name.
Choose your vinyl and cut out the names. Permanent vinyl like Oracal 651 should last outdoors for several years.
Clean the surface of the tags or stakes with rubbing alcohol so the vinyl will adhere properly.
Weed the excess vinyl from around the names.
Tip: Reverse weeding is helpful when you have small letters. Before weeding the excess vinyl, apply the transfer tape, remove the backing from the vinyl and then weed off the excess vinyl from the transfer tape. This will hold the small letters in place while you weed it.
Apply transfer tape to the names and peel the backing off of the vinyl.
Center the name and burnish it onto the stake.
Remove the transfer tape.
Let the vinyl cure for at least hours indoors before placing them outdoors. If it is cold and rainy you might wait 72 hours.
Step by step video showing how to create, cut, and make plant labels for your garden with vinyl
Check out the video below for step by step instructions to use the file.
I also show a quick way to make stakes from a milk jug or similar plastic.
When you are finished making your labels you can use them to mark your seeds when you plant them or put them right in the garden.
To make multiple stakes with the same name, just duplicate it and make as many as you need.
Bring them inside when your plants are done for the season and use them year after year.